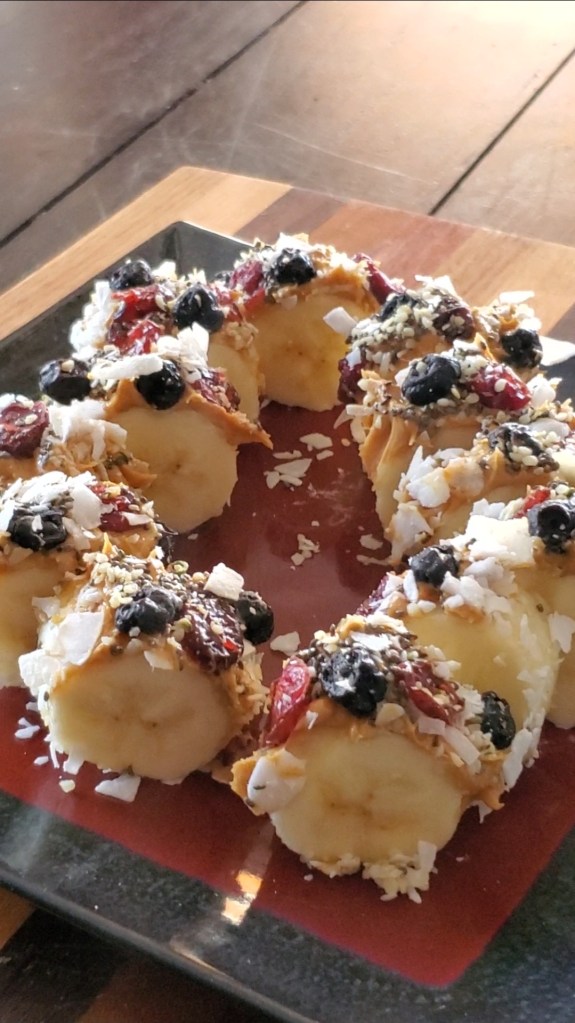
It is still the season for cookies, although today I had a little bit of a cookie fail 🤣 sooooo week 50’s healthy snack is Apple Donuts!
I’m in love with how fast and easy these were! The versatility of options are endless.
I ended up make 6 different kinds
1. Peanut butter base with shredded coconut and yogurt chips 2. Peanut butter base with cinnamon and raisins 3. Blueberry greek yogurt base with pumpkin seeds and dried blueberries 4. Blueberry greek yogurt base with sunflower seeds and yogurt chips 5. Mascarpone base with walnuts and honey drizzle 6. Mascarpone base with cinnamon and dried cranberries
My favorite was between the mascarpone with walnuts and honey or the yogurt with pumpkin seeds and dried blueberries…but whoa, it was hard to pick because these all turned out killer.
I’ve included a picture of my failed attempt at naturally dyed wreath cookies for tax lol.
Tis the season for Christmas Cookies!! For week 49 I bring you Almond Thumbprint Cookies! I had to fill in cooling time with some art projects to not tempt myself into eating … so I worked on our Christmas stockings. The little one and I both agree they were worth the wait!
Almond Thumbprint cookies
For the jam filling
1 1/2 cups mixed berries
1/2 cup pure maple syrup
1/8 teaspoon cinnamon
2 teaspoons cornstarch
For the almond cookies
2 cups almond flour
1 cup all purpose or 1-for-1 gluten free flour
1/4 teaspoon baking powder
1/2 teaspoon kosher salt
1/2 cup pure maple syrup
5 tablespoons melted butter (sub coconut oil or vegan butter for vegan)
For the glaze (you’ll use about 3/4 of this)
1/2 cup powdered sugar
1 tablespoon milk (or oat or almond milk for vegan)
INSTRUCTIONS
Make the homemade jam: Add the berries, maple syrup, and cinnamon to a small saucepan. Cook on low heat for 10 to 12 minutes until the berries break down. Run the mixture through a mesh strainer into a clean bowl, mashing the berries with a spatula. Return the sauce to the same saucepan, then add the cornstarch and heat on low 2 more minutes until bubbly and thick. Remove from the heat and allow to cool while making the cookies. (This step can be made ahead and refrigerated for up to 1 week before making the cookies.)
Bake the cookies: Preheat the oven to 350 degrees.
In a large bowl, mix the almond flour, all purpose flour, baking powder and kosher salt in medium bowl.
In a separate medium bowl, whisk together the melted butter and maple syrup. Mix in the dry ingredients and stir with a spatula until well combined.
Line two baking sheets with parchment paper. Take about 1 tablespoon of the dough and roll it into small balls, about 12 for one tray, 24 in all. Start with one tray only, then refrigerate the dough for the second tray. Gently press your thumb into the center of the ball. (You can re-form the cookie with your fingers if it cracks a little.) Then add about 1/2 teaspoon of jam into each cookie.
Bake the first tray 13 to 15 minutes until browned on the bottom. Allow to cool on the tray for 5 minutes, then place on a baking rack to cool. Meanwhile, prepare and bake the second tray and allow it to cool (baking the trays separately allows for the most even bake).
Ice the cookies (optional – if freezing, add after): Once the cookies have cooled to room temperature (about 20 to 30 minutes), make the powdered sugar icing. Stir together the confectioners’ sugar and milk (start with a little less if using non-dairy milk) until a smooth sauce forms and all lumps are dissolved. Place the cookies on parchment paper, dip a fork into the glaze and drizzle in a zigzag pattern. Let the cookies sit at room temperature until the glaze is dry, about 15 minutes.
Store at room temperature for 3 days or refrigerated for 1 week. To freeze, place baked cookies without icing in an airtight container and freeze for 2 to 3 minutes. Add the icing after thawing to room temperature.
I don’t think I got enough apple pie all of last weekend, yet I have no more to eat. Extreme dilemma…..So breakfast today was an Apple Pie Smoothie, which is healthier than it sounds!
1 frozen apple
1/4 tsp. cinnamon
1 tsp. flaxseed
1 Tbsp. chia seed
1/4 cup walnuts
1 cup almond milk (or any milk)
5 pitted dates
Blend!
If you want to omit dates, try some honey or pure maple syrup to sweeten it up!
A little post Thanksgiving treat you won’t regret 🙃
With 2 days until Thanksgiving 🦃 I decided to pick a snack that had a holiday feel to it this week, Sweet Potato Rounds with Herbed Ricotta and Walnuts. Continuing the holiday spirit, two things I am grateful for are handwritten letters and creating new family traditions, what are two things YOU are grateful for today?
2 to 3 large sweet potatoes sliced into ¼-inch rounds
1 Tbsp avocado oil
1 pinch ground cinnamon
1 pinch salt
Herbed Ricotta:
1 cup whole milk ricotta cheese
1-½ tsp Italian seasoning
1 Tbsp + 1 tsp honey
¼ tsp sea salt or to taste
For Serving:
1 cup raw walnuts roasted and chopped
¾ cup dried cranberries
honey
Instructions
Add all of the ingredients for the herbed ricotta to a small bowl and stir well to combine. Refrigerate until ready to use.
Preheat the oven to 400 degrees F. Add the sweet potato slices to a large mixing bowl and drizzle with avocado oil. Sprinkle sea salt and ground cinnamon over rounds. Use your hands to rub the oil and seasoning on both sides of the sweet potato rounds. Arrange rounds on a large baking sheet (or two if necessary). Bake for 20 minutes. Flip the rounds, then bake for another 17 to 20 minutes, or until rounds are cooked through and crispy on the edges
Spread walnuts on a baking sheet. 10 minutes before the potato rounds are finished cooking, place the walnuts in the oven to roast.
Remove sweet potato rounds and walnuts from the oven. Place walnuts on a cutting board and chop.
Place oven on high broil setting and move the oven wrack second to the top shelf. Place a dollop of herbed ricotta on each sweet potato round and place in the oven for 2 minutes, just until ricotta is melty and warm.
Add chopped walnuts and dried cranberries to the rounds. Drizzle with honey and serve!
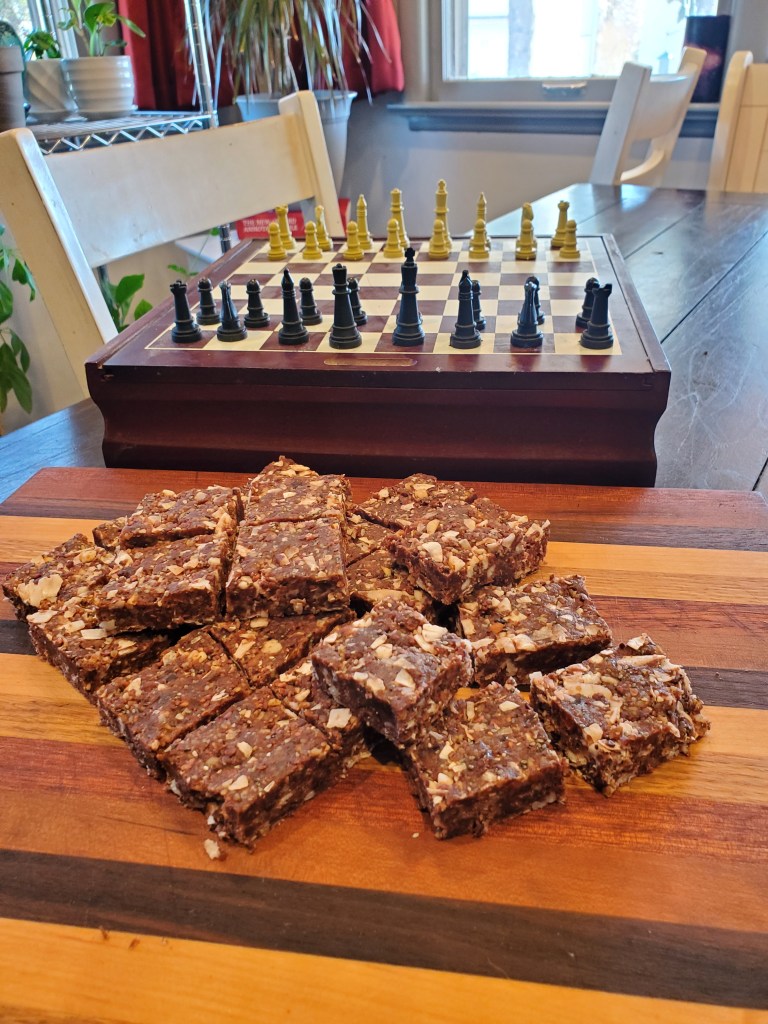
Wrapping up the end of the 45th week with a gluten and dairy free nibble, Brazilian Bliss Bites. Yum. We decided to enjoy them with a cup of tea and a game of chess on a snowy afternoon.
Dates contain more than double the amount of potassium than a similar amount of bananas. Cacao is high in Magnesium; Magnesium is important for many processes in the body, including regulating muscle and nerve function, blood sugar levels, and blood pressure and making protein, bone, and DNA. Brazil nuts are high in Selenium; Selenium is important for reproduction, thyroid gland function, DNA production, and protecting the body from damage caused by free radicals and from infection.
Brazilian Bliss Bites
2 cups organic walnuts
1 cup raw cacao powder
1/4 teaspoon sea salt
16-20 soft Medjool dates, pitted
1/2 cup unsweetened coconut
1/2 cup brazil nuts, coarsely chopped
2 tablespoons chia seed
INSTRUCTIONS
In a food processor, add in the walnuts and process until a crumbly texture is formed (about 15-20 seconds).
Add in cacao powder and sea salt and pulse to combine.
With the machine running, slowly add in the dates, a few at a time, through the feed tube, so they can fully incorporate into the mixture. Make sure that the dates are blended into the mixture before you add more. Process until all of the dates are incorporated into the mixture.
The cacao mixture should resemble brownie crumbs at this point. You can test the mixture by pressing it in-between your fingers. It should easily stick together and you should be able to easily mold it into a ball, if not, then add more dates, but if you use 16-18 dates, your mixture should be perfect!
Transfer the cacao batter to a medium-sized bowl and add in shredded coconut, chopped brazil nuts and chia seeds.
Take the mixture and press it down into a parchment lined 13 x 9 pan.
Cover and place the cacao mixture in the refrigerator to cool for a couple of hours, (or freezer to have them cool faster) as the bites taste better when cooled and are easier to cut.
Once cooled, lift the parchment paper and cacao mixture out of the pan, and cut it into bite sized bars or squares.
Storage: Wrap the cacao bites up tightly in the parchment paper and then with a layer of tin foil, or store them in a sealed container in the refrigerator or freezer. Bars will keep fresh for up to one week, but they probably won’t last that long.
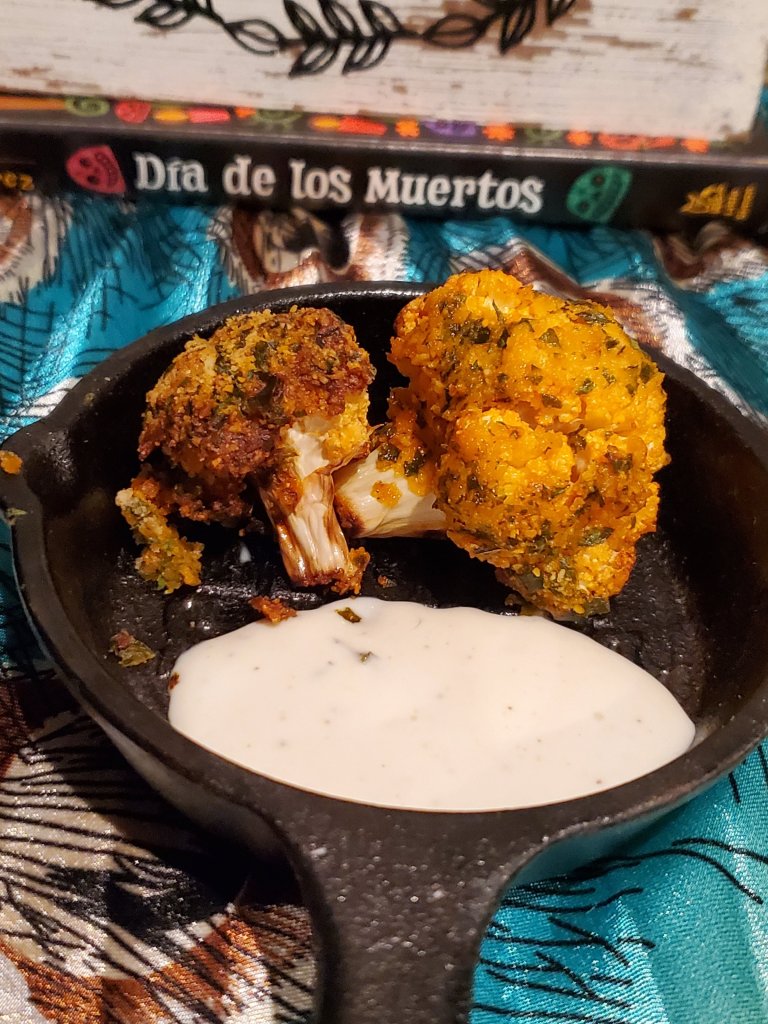
Hope you enjoyed your weekend! Halloween and Dia de Los Muertos give us plenty to celebrate. Since we touched on Halloween last week, I wanted to share a healthy snack we made for Dia de Los Muertos.
I turned to Chris, while sipping our morning coffee, and asked him what he wanted to add to the celebration alter for Sunday. A soft smile came across his face as he told me about his dear friend, Mathew Kennen, and how much he liked the Buffalo Cauliflower at Zokas, one of the best restaurants ever in Pine, CO. So week 44, in remembrance of our dear friend Mat, is Buffalo Cauliflower ❤ NFA
Buffalo Cauliflower
1 to 1.5 head cauliflower, cut into florets (you’ll need about 4 to 5 cups)
2 tablespoons butter, melted
1 tablespoon olive oil
1/2 cup Frank’s Red Hot Sauce
1/2 cup almond flour
3 tablespoons dried parsley
1/2 tablespoon garlic powder
1 teaspoon Lawry’s Seasoning Salt
Instructions
Place cauliflower florets in a large mixing bowl and set aside.
Melt butter; stir in olive oil and hot sauce until thoroughly combined.
Pour the hot sauce mixture over the cauliflower; mix around until all cauliflower florets are coated.
In a separate bowl whisk together almond flour, dried parsley, garlic powder, and seasoning salt.
Sprinkle about a handful at a time of almond flour mixture over the cauliflower; gently mix until everything is coated.
Transfer half of the prepared cauliflower to the air fryer.
Air fry at 350˚F for 14 minutes, shaking a couple times during the cooking process. Cauliflower is done when the florets are a bit browned, but not mushy.
Remove cauliflower from the Air Fryer; set aside and keep covered.
Repeat the same process with the remaining cauliflower florets.
Serve with celery or carrot sticks and your favorite ranch dressing.
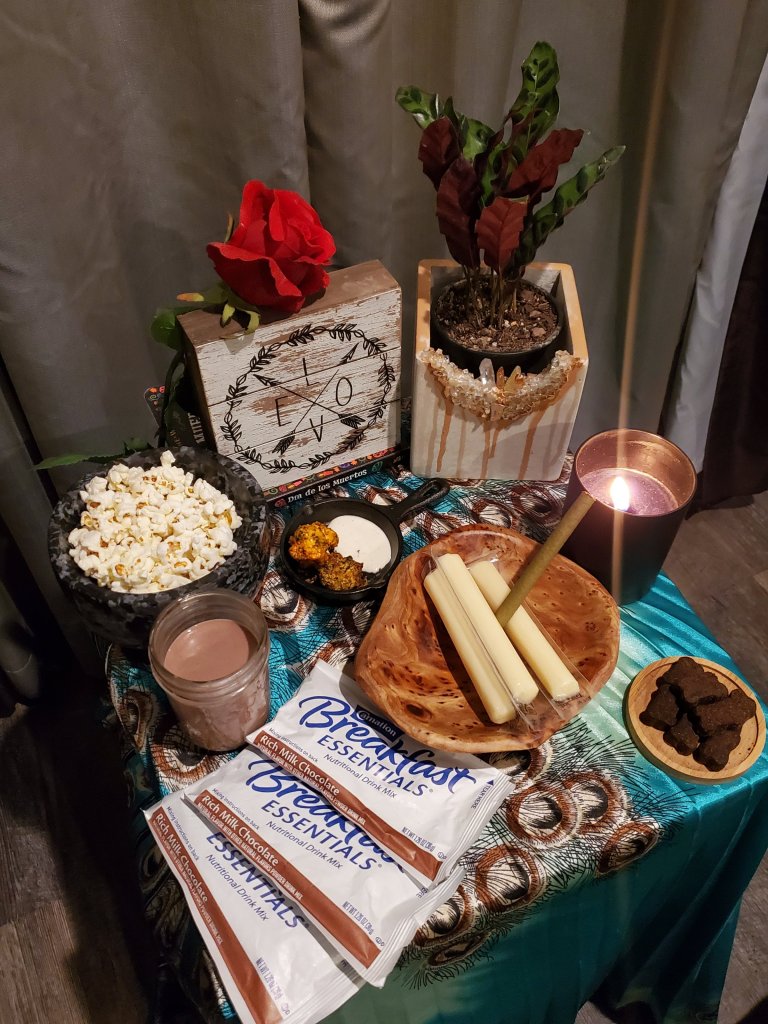
Dia de Los Muertos is an ancient tradition celebrated in Mexico and other places around the world. During this holiday, people take time to remember and celebrate family and friends who have passed away. Although it’s called “day of the dead”, the celebration lasts for several days! Dia de Los Muertos is for celebrating the beauty of life and death rather than mourn it, it reminds us to enjoy life all year round and to honor our loved ones, this way they stay in our hearts forever.
Popcorn for my Grandma, buffalo cauliflower plus dip for Mat, breakfast essentials for my ride or die Sean, string cheese (and the peacock cloth) for my dear friend Jamie, a Cigar for Chris’s Papi, and dog treats for our furry family. We love you 🖤
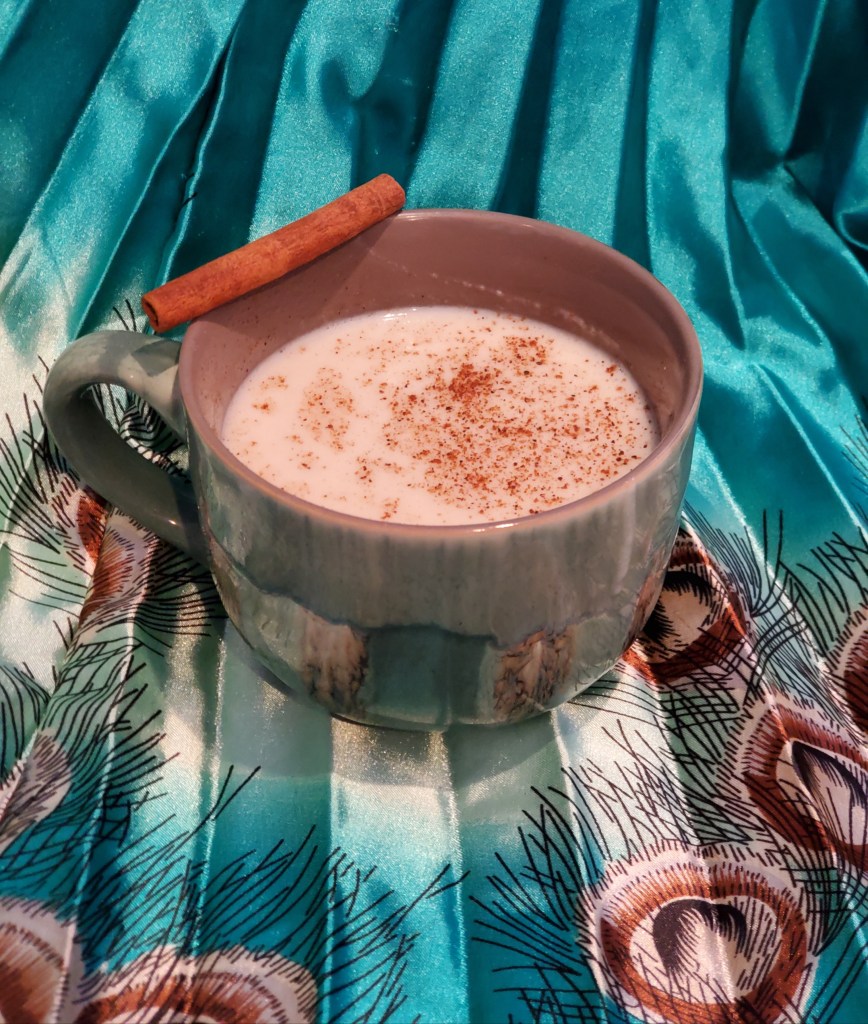
We also made Atole to continue our celebration this morning. Atole (ah-toe-lay) is a drink made with masa, finely ground corn flour. When chocolate is added, it becomes champurrado (cham-poor-ah-doe). The word “atole” is derived from Nahuatl, the still-living language of the Aztecs, who were defeated by Hernan Cortez in 1521 in what is now Mexico City. Atole was popular long before Cortez surprised Montezuma with a visit, so the people of Mexico have been drinking atole for many centuries, probably millennia. That’s really no surprise as atole is, in fact, probably the easiest way imaginable to consume corn, a crop first cultivated in the Americas. Just add water to ground corn, and voila: atole.
Atole is like very thin porridge. Served warm, it’s an excellent way to take the chill off a cold morning. Relatively quick and easy to prepare, atole is frequently consumed at breakfast or after dinner, but can be enjoyed any time of day.
ATOLE
3 cups water
9 Tbsp. Turbinado sugar or brown sugar cane
1 whole cinnamon sticks
10 Tbsp. corn flour
A pinch of salt
3 cups whole milk
1/2 tsp. vanilla extract
Nutmeg (optional)
Instructions
Add water, brown sugar cane and cinnamon sticks to large, heavy pot over medium-high heat. Bring water to boil, stirring occasionally to dissolve sugar.
Meanwhile, in medium bowl using whisk, whisk together masarica, salt and milk until completely smooth. Pour masarica mixture into pot with sugar mixture and bring liquid to boil, whisking occasionally; reduce heat to low. Stir in vanilla extract and continue cooking, whisking occasionally, until mixture is smooth and thick, about 10 minutes more. The atole is ready when the drink coats the back of wooden spoon.
Remove pot from heat. Divide atole evenly among serving mugs. Sprinkle with nutmeg if that sounds nice.. Serve warm.
Halloween is in 5 days! Which means… festivities? Things look a lot different this year with COVID. I am anti-social myself, however, if you’re into holiday parties, this weeks snack is one of those delights you don’t have to feel bad about snacking on!
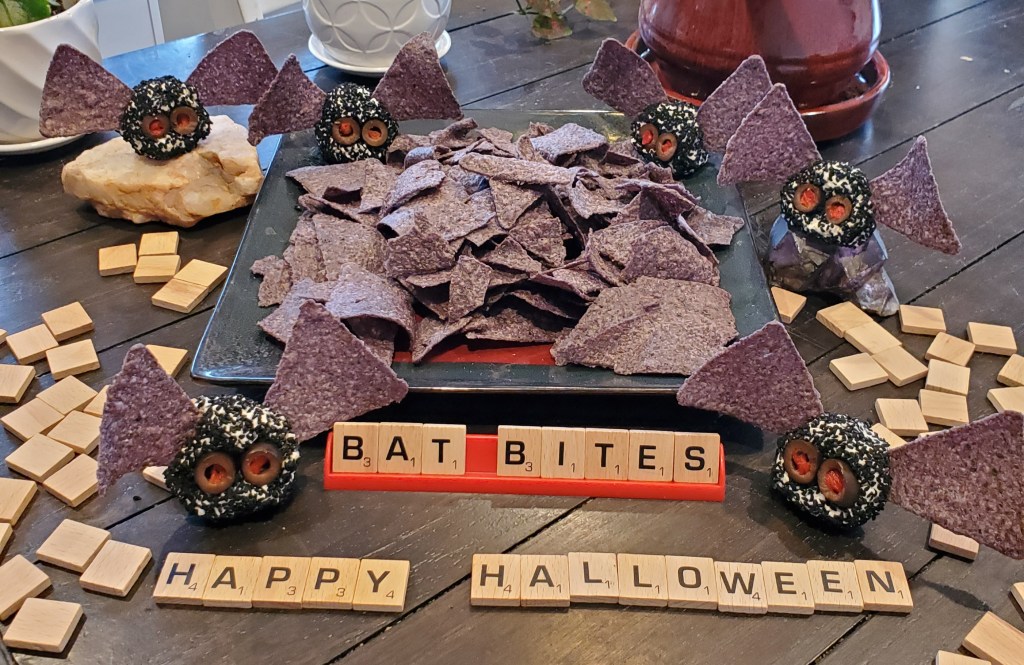
Bat Bites!
4 ounces goat cheese, room temperature
1/4 cup cottage cheese
1/8 teaspoon sea salt
1/2 teaspoon black pepper
black seeds or black sesame seeds for a more mild flavor
blue corn tortilla chips
black olives
pimentos
Place the goat cheese, cottage cheese, salt and pepper in your food processor and pulse 6-8 times until combined.
Scoop out the cheese and form into golf ball sized balls (about 1 1/2 and 2 ounces or 3 balls).
Roll the balls in black seeds until they are completely covered.
Slice some olives for the eyes and place on the cheese balls, insert pieces of pimentos in the center of the eyes. Place in the refrigerator for 30 minutes or overnight to firm up.
Before serving, insert 2 tortilla chips on each side for bat wings.
I opted for some garlic and herb goat cheese, and I do not regret that decision. Goat’s milk has more medium-chain fatty acids than cow’s milk; these types of fat are rapidly absorbed in your body and less likely to be stored as fat. It may be easier for some people to digest than cheese made from cow’s milk, this may be because goat’s milk is lower in lactose and contains different proteins. In particular, goat cheese contains A2 casein, which may be less inflammatory and less likely to cause digestive discomfort than the A1 casein found in cow’s milk.
Cottage cheese is much higher in protein than other cheeses. Several studies indicate that eating high-protein foods like cottage cheese can increase feelings of fullness and help decrease overall calorie intake, which in turn may lead to weight loss
Black seeds, also known as black cumin, nigella or by its scientific name Nigella sativa. It grows up to 12 inches tall and produces a fruit with seeds that are used as a flavorful spice in many cuisines. In addition to its culinary use, it has been used for headache, toothache, nasal congestion, asthma, arthritis, and intestinal worms. It has also been used for pink eye, pockets of infection, and parasites. Today, black seed is most commonly used for asthma, diabetes, hypertension, weight loss, and digestive tract conditions.
The black seeds taste like a combination of onions, black pepper, and oregano. They have a pungent, bitter taste and smell. They were incredibly more flavorful than I expected them to be, so I would probably use less seeds than pictured or make them bigger in size to sweeten the ratios, I prepared six balls from the recipe originally. There is some scientific evidence to suggest that black seed might help boost the immune system, fight cancer, reduce swelling, and lessen allergic reactions by acting as an antihistamine.
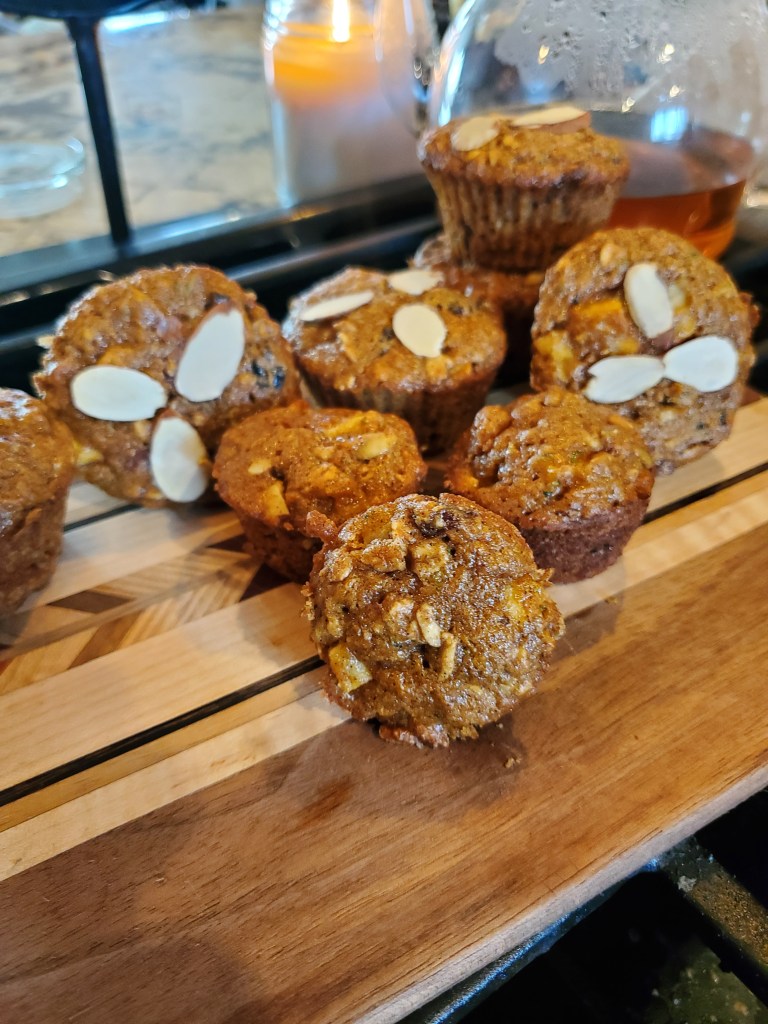
Time to see what’s left in the garden! On my peruse through I decided to gather some carrots and a zucchini. With a little bit of everything that reminds me of fall, I bring you Harvest Muffins! I put my adjustments for altitude in parenthesis 🥰 enjoy!
1 1/2 cups whole wheat flour (add 2 tbsp)
1 cup sugar (subtract 2 tbsp.)
1/2 cup oats
1 tablespoon ground cinnamon
2 teaspoons baking soda (subtract 1/2 tsp.)
1/2 teaspoon salt
2 medium (2 cups) apples, peeled, cored, cut into 1/4-inch pieces
1 cup carrots, grated
1/2 cup zucchini, grated
3/4 cups dried cherries and raisins, coarsely chopped
1/2 cup chopped pumpkin seeds and almonds
3 eggs
1/2 cup butter, melted
1/2 cup unsweetened applesauce (add 3 tbsp)
2 teaspoons vanilla
Directions
Heat oven to 350°F. Place paper baking cups into muffin pan cups or grease muffin pan cups; set aside.
Combine flour, sugar, oats, cinnamon, baking soda and salt in bowl.
Whisk eggs in bowl. Stir in melted butter, applesauce and vanilla. Add flour mixture to egg mixture; stir until just moistened. Add apples, carrots, dried cherries and nuts; stir until well mixed.
Spoon batter evenly into prepared muffin pan cups.
Bake 18-25 minutes or until toothpick inserted into center comes out clean. Cool 5 minutes; remove from pan. Serve warm or at room temperature.
Perfect weather here for warm muffins and a cup of tea 🍵
I took a stroll through my garden this morning to see how everything was doing, as we near fall and cooler temperatures approach. To my delightful surprise, I discovered quite a few strawberries in my little patch! I also found a lot of Cayenne peppers if anyone has some good ideas for those. My garden inspired this week’s healthy snack, Strawberry Oatmeal Bars. YUM!
For the Strawberry Bars:
1 cup old-fashioned rolled oats
3/4 cup whole wheat flour
1/3 cup light brown sugar
1/4 teaspoon ground ginger
1/4 teaspoon sea salt
6 tablespoons unsalted butter or coconut oil – melted
2 cups small-diced strawberries
1 teaspoon cornstarch
1 tablespoon freshly squeezed lime juice
1 tablespoon-ish of honey
For the Vanilla Glaze (optional, but huge yes)
1/4 cup powdered sugar – sifted
1/4 teaspoon pure vanilla extract
1/2 tablespoon milk – any kind you like
Place a rack in the center of your oven and preheat to 375 degrees F. Line an 8×8-inch baking pan with parchment paper.
In a medium bowl, combine the oats, flour, brown sugar, ginger, and salt. Pour in the melted coconut oil and stir until it forms clumps and the dry ingredients are evenly moistened. Set aside 1/2 cup of the crumble mixture, then press the rest into an even layer in the bottom of the prepared pan.
Scatter half of the strawberries over the crust. Sprinkle the cornstarch evenly over the top, then sprinkle on the lime juice and drizzle honey. Scatter on the remaining berries, then drizzle more honey. Sprinkle the reserved crumbs evenly over the top. You will have some fruit showing through.
Bake the bars for 35 to 40 minutes, until the fruit is bubbly and the crumb topping smells toasty and looks golden. Place the pan on a wire rack to cool completely (you can speed this process along in the refrigerator).
While the bars cool, prepare the glaze: In a small bowl, briskly whisk together the powdered sugar, vanilla, and milk until smooth. Feel free to add more milk if a thinner consistency is desired. Lift the bars from the pan. Drizzle with glaze, slice, and serve.